


10 Nights Malaysia - Kuala Lumpur & Langkawi
Duration:
10 Nights
From €1,695pp
March 2026.
Savings of up to 15% plus 2 Free Nights.
Daily cocktail reception in KL.
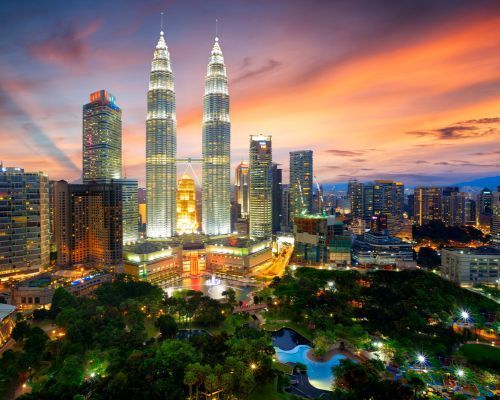
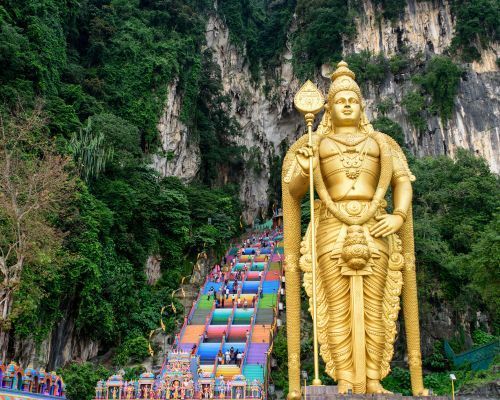
Kuala Lumpur
Kuala Lumpur is the capital city of Malaysia, boasting gleaming skyscrapers, colonial architecture, charming locals, and a myriad of natural attractions. Divided into numerous districts, its main hub is called the Golden Triangle, which comprises Bukit Bintang, KLCC and Chinatown. KL is widely recognised for numerous landmarks, including Petronas Twin Towers (the world’s tallest twin skyscrapers), Petaling Street flea market, and Batu Caves, which is over 400 million years old. With frequent sales events throughout the year, expansive shopping malls like Pavilion KL and Suria KLCC are also among the biggest tourist attractions in the city, hosting a wide range of upmarket labels from all over the world. Plus, if you need more reasons to love Kuala Lumpur, gastronomic delights are abundant, with thousands of hawker stalls, cafes, and restaurants serving every imaginable type of delicacies.
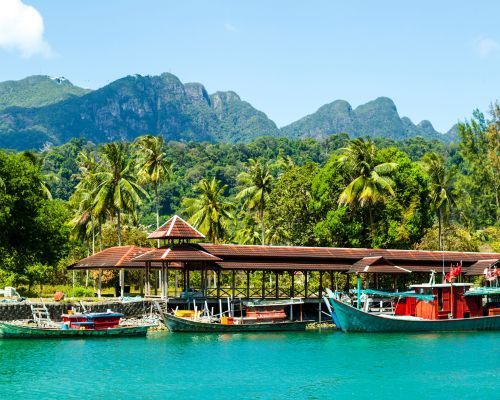
Langkawi Island
Langkawi is an archipelago made up of 99 islands on Malaysia’s west coast. Surrounded by turquoise sea, the interior of the main island is a mixture of picturesque paddy fields and jungle-clad hills. If you’re intent on carting off duty-free alcohol, cigarettes and chocolate, then this is the place to be. Still, nature lovers will find the island just as agreeable as the shoreline is fringed by powder-fine sand and swaying coconut trees. The island is especially recognised for its excellent diving opportunities and this tropical gem hides a treasure trove of other exciting holiday opportunities. From the expansive Underwater World Langkawi along Pantai Cenang to the soaring Cable Car in Pantai Kok, Langkawi is an electrifying locale that keeps visitors coming back for more.
- Flights from Dublin
- Taxes
- Transfers
- BB basis
- Accommodation
*Price based on 2 adults sharing